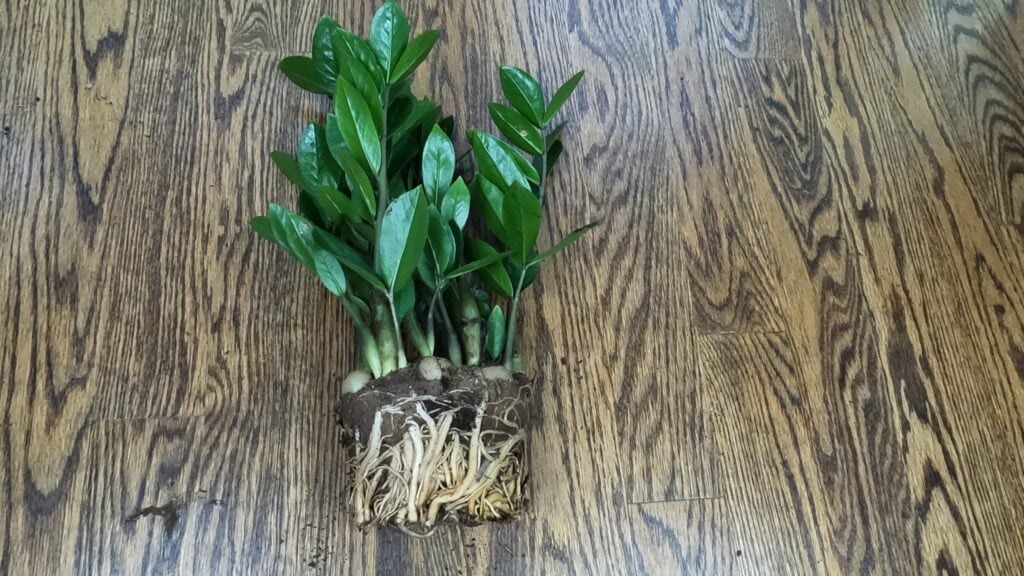
Is your ZZ plant or Zamioculcas zamiifolia looking overcrowded? It’s bursting in its pot, you can literally see the lumps sticking out of the pot! And there are a lot of roots coming out of the drainage holes. If you are seeing this, that means your ZZ plant is overcrowded and it is definitely time to divide and repot your ZZ plant. Below is a step by step tutorial on how to divide your ZZ Plant. I also have a video of how to divide ZZ Plant if you prefer to watch it.
How to Divide ZZ Plant Video
How to Divide ZZ Plants
1. Remove ZZ Plant from its Pot
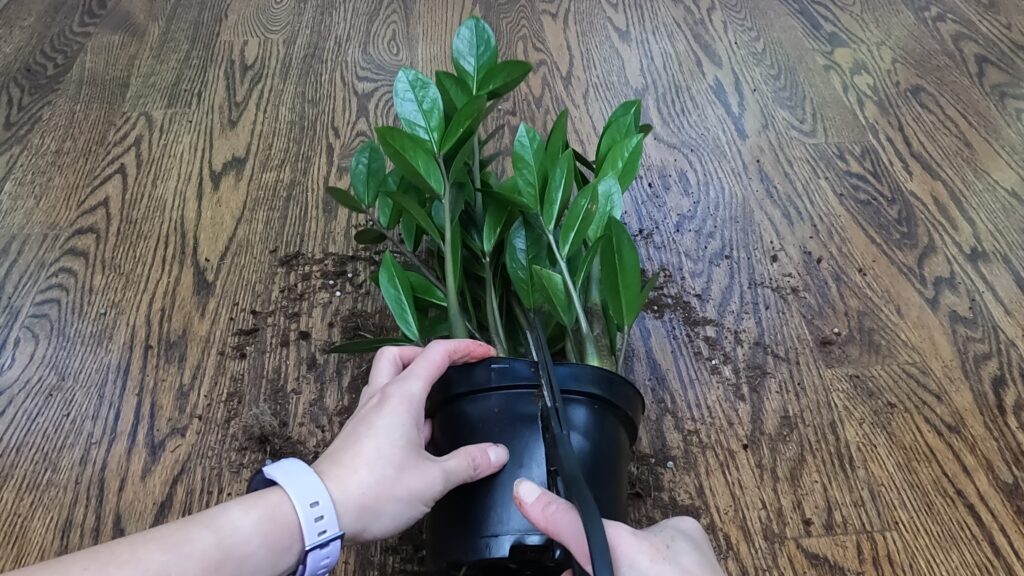
It’s pretty straightforward to divide ZZ plants. First, remove the ZZ plant from its pot. It’s easier to do this if you have a small ZZ plant. It’s hard to remove large ZZ plants from their pot. In my case, my ZZ plant is bursting so it was really hard to pull it out of the pot. It was almost impossible to remove the overcrowded ZZ plant. The only way I could remove the plant from its pot was to cut the pot with a scissor.
2. Divide the ZZ Plant
After removing the ZZ plant from its pot, I visually inspected my ZZ plant for natural division points. Each division should have sufficient leaves, stems, tubers, and roots. I wanted to get 3 plants out of this one plant. I started pulling apart the ZZ plant.
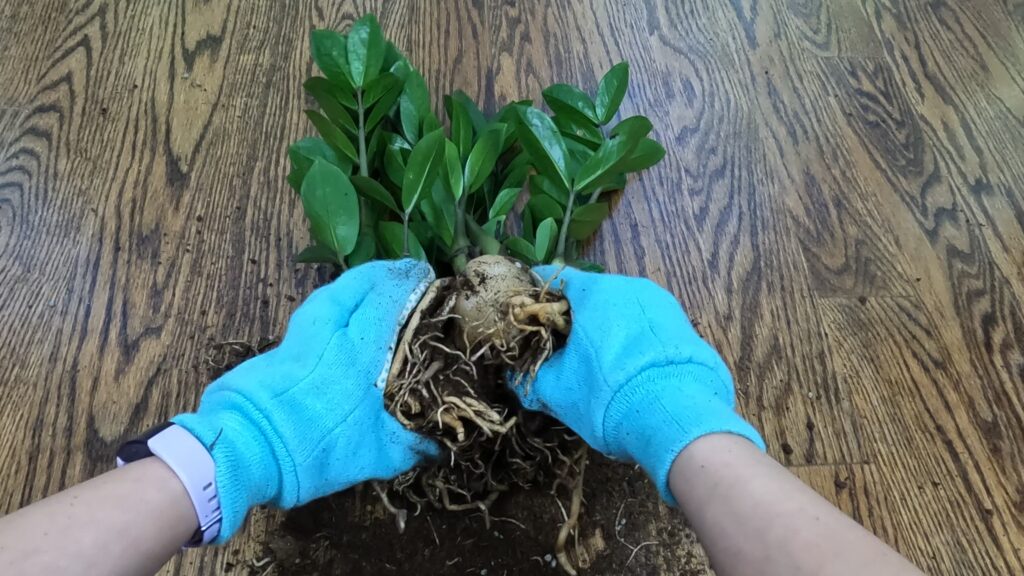
Don’t be scared, it will feel like you are ripping your plant apart but as long as you give each division enough leaves, stems, tubers and roots it will survive. This is the most difficult part of the entire process. Sometimes, you may have to cut the tubers in half if that’s the only way to divide it.
3. Plant Each ZZ Plant Division
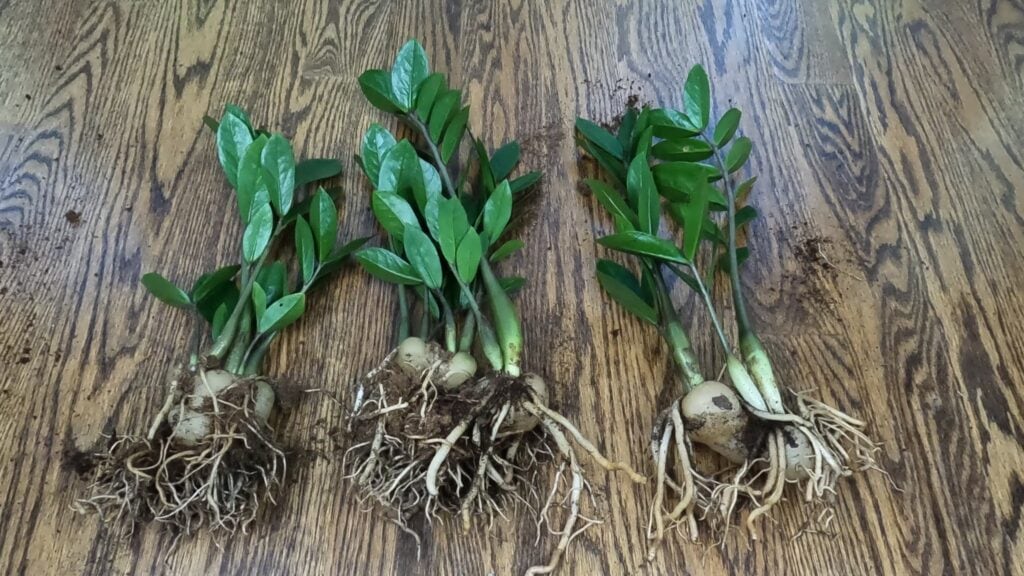
I managed to separate my ZZ plant into three plants. As you can see, each division has enough leaves, stems, tubers, and roots. I planted each division into its own pot. Make sure you don’t plant your ZZ plant too deep. You should be able to see the tubers, don’t cover the tubers entirely with soil. I used a well-draining, organic potting mix for my ZZ plant. And make sure your plant them in pots with drainage holes.
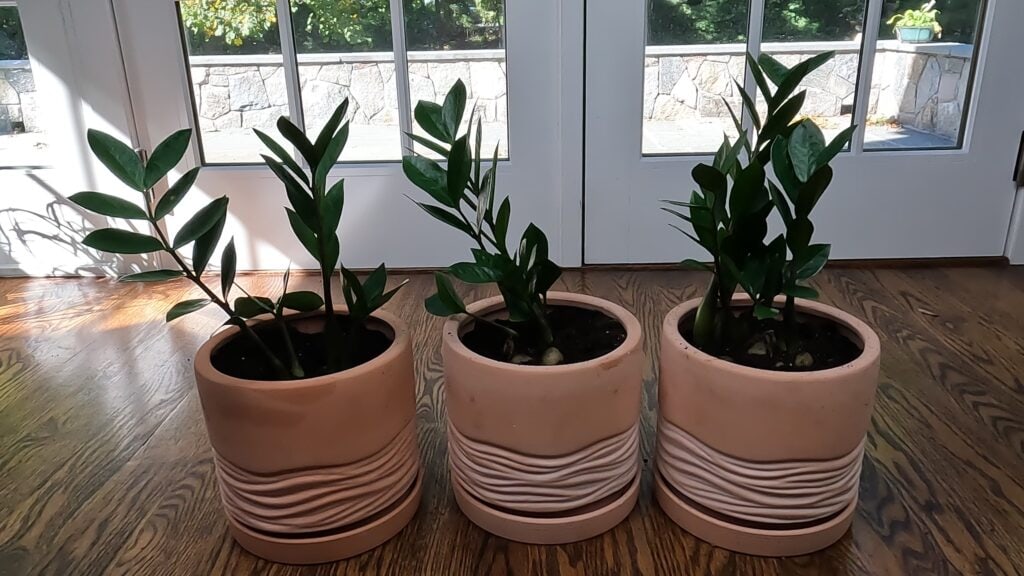
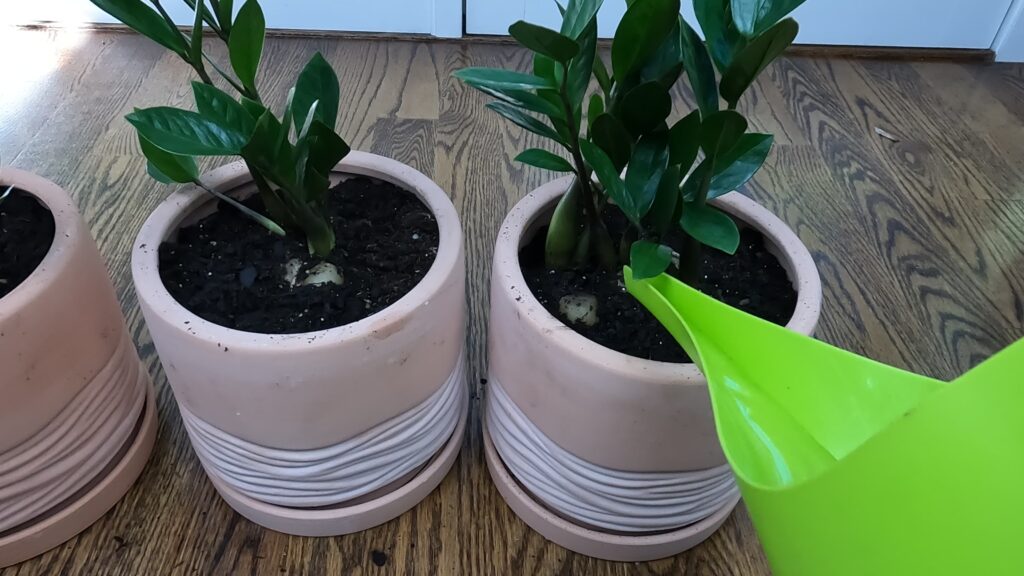
4. Water your ZZ Plant
After planting each ZZ plant, water each plant. Then keep them in an area with bright, indirect light.
ZZ Plant is Toxic to Humans and Pets
One thing you should know before dividing your ZZ plant is that it is toxic to humans and pets. ZZ plants contain calcium oxalate. Chewing on the leaves and stems can cause vomiting and difficulty breathing. It can also result in swelling of lips, tongue, and mouth and excessive drooling. I suggest being safe when you are handling your ZZ plant. Wear gloves. Don’t touch your eyes and mouth. Wash your hands thoroughly after handling your ZZ plant.
ZZ Plant 1 Week after Dividing
Here are my ZZ plants 1 week later. They look happy and healthy.
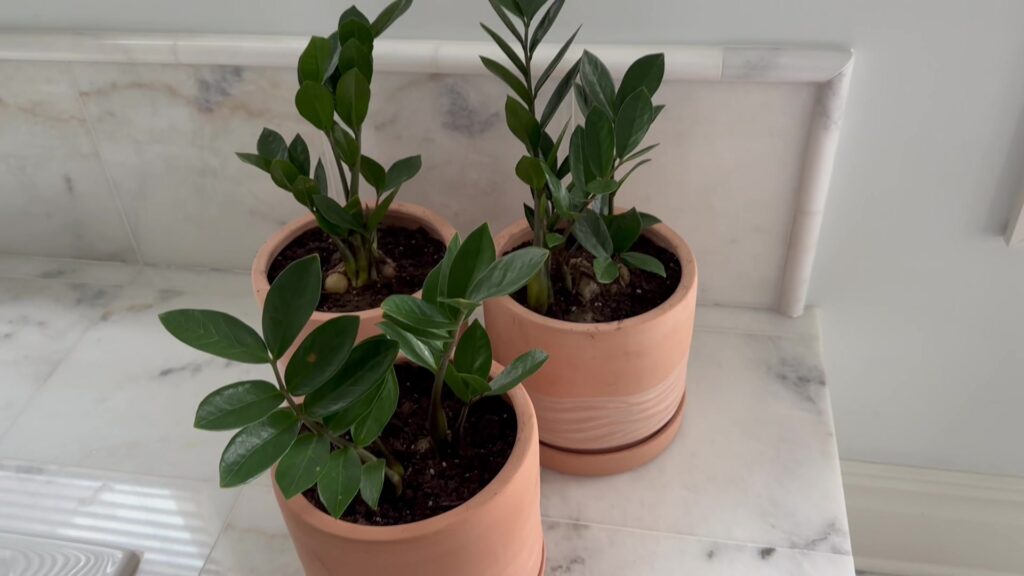
ZZ Plant 5 Months After Dividing
Here is an update 5 months after dividing my ZZ plant. One of the ZZ plants did not survive the division! There are some important lessons to be learned. Don’t make the same mistakes I did!
Two of the ZZ plants are doing really well. Both of the ZZ plants look really healthy and happy (see photos below). The ZZ plants are growing vigorously, there are new shoots coming out.
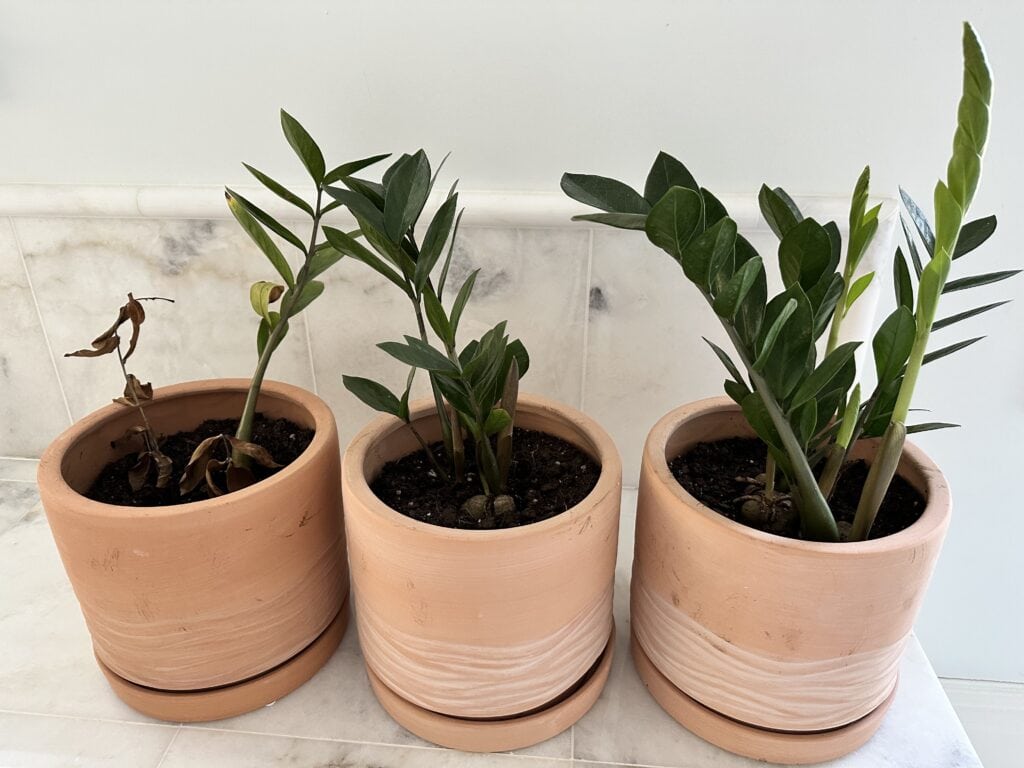
But the third ZZ plant does not look healthy, in fact, it’s borderline dying. The ZZ plant leaves have turned yellow and brown. Many of the ZZ plant leaves died and fell off the stem. Some of the ZZ plants’ stems turned brown and wilted away. Now there is only one stem left on my ZZ plant. I check my ZZ plant every day, hoping it survives. Sadly, this ZZ plant is just clinging to life (see photo below).
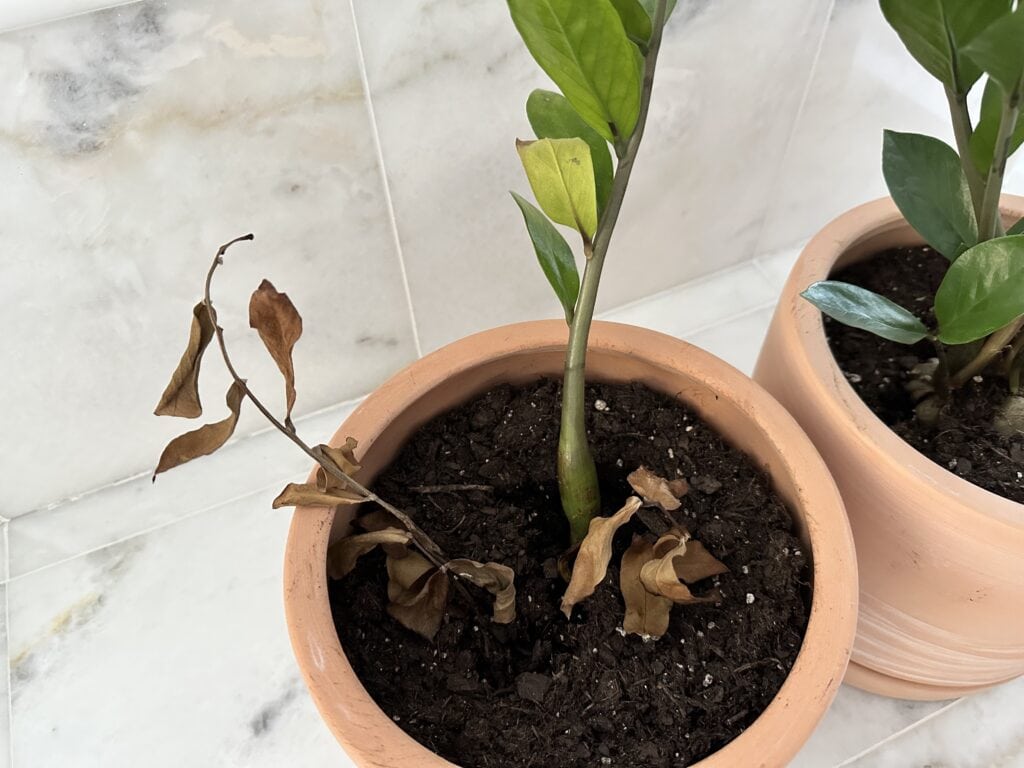
So what happened? Why are one ZZ plant dying and the other two ZZ plants thriving and growing robustly? I have a theory for what I did wrong when dividing my ZZ plants. When I divided the ZZ plant, I made the mistake of not dividing the ZZ plant bulbs equally. The two ZZ plants that are growing nicely have sufficient bulbs. While the ZZ plant that is dying barely has any bulbs. It seems like these bulbs are vital to ZZ plant growth. The bulbs help the ZZ plant store water and keep it drought tolerant. The ZZ plant is dying because it didn’t get enough bulbs when I divided it.
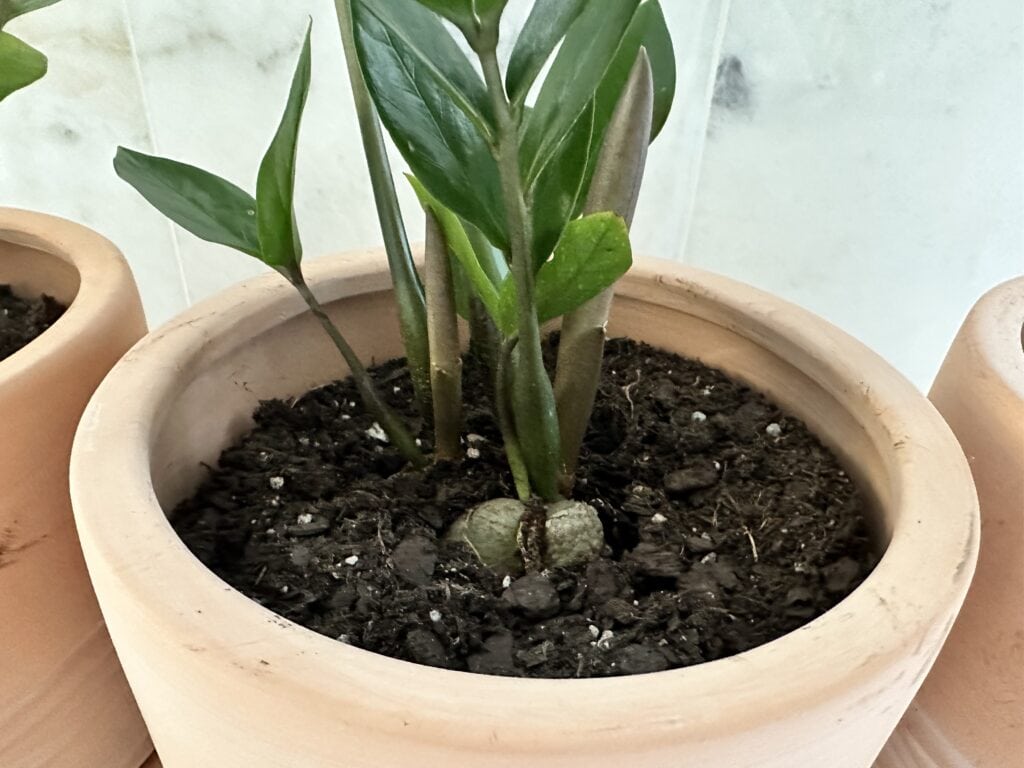
And another mistake that I did is to plant these ZZ plant divisions in unglazed terra cotta pots. Because these terra cotta pots are unglazed, it doesn’t retain moisture as well as plastic pots or glazed ceramic pots. The dying ZZ plant without bulbs is losing moisture at a quick rate because it’s planted in an unglazed terra cotta pot. And to make it worse, I was watering all three ZZ plants at the same time. In hindsight, the ZZ plant that is dying needed more water than the other two ZZ plants because it didn’t have the same moisture retention capability since it lacks tubers. No wonder the ZZ plant is dying, it doesn’t have enough bulbs, it’s in a pot that is bad at retaining moisture and I wasn’t watering it enough!
So what I actually did when I realized this is I increased my watering frequency and I moved the dying ZZ plant to my bathroom. I think the increased watering and the humidity in my bathroom are helping it. The ZZ plant stopped dropping its leaves and for the most part, the leaves are still green. I think it’s hanging on for dear life!
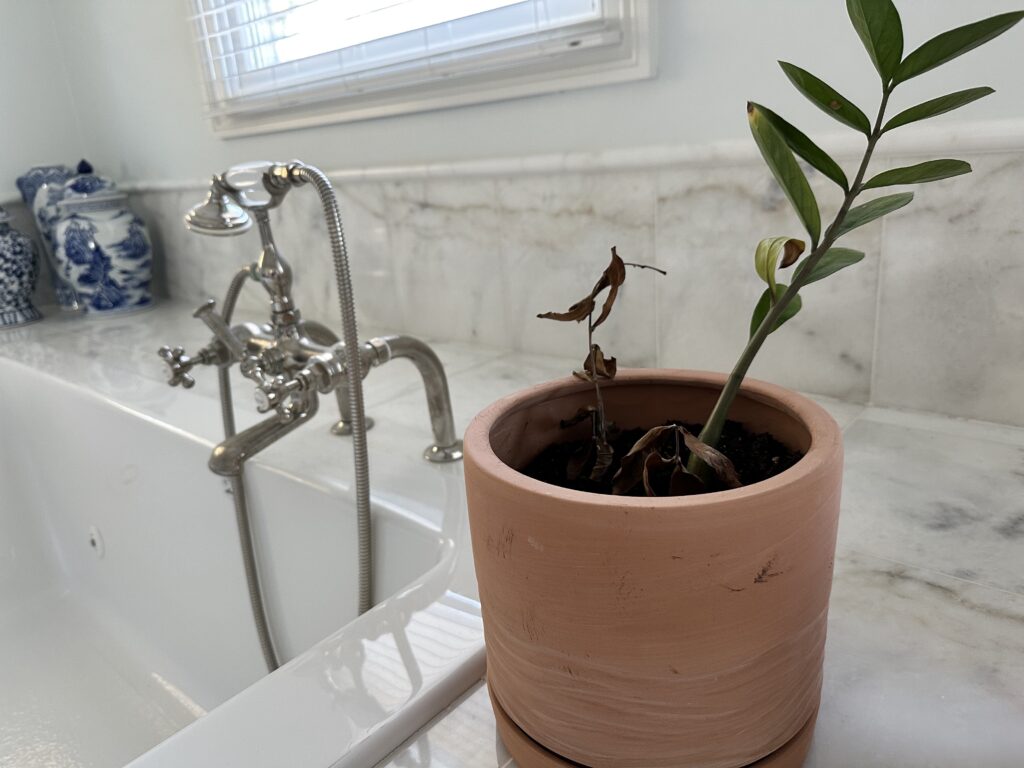
So what I learned from this whole experience of dividing ZZ plants is 1, when you divide the ZZ plants each division needs to be planted with enough bulbs. The bulbs are essential to ZZ plants. Second, if I were to do this again, I’d plant my ZZ plants in glazed ceramic pots or plastic pots for better moisture retention. I don’t like that the lack of moisture retention from the unglazed terra cotta pot since I live in Connecticut. My home is really dry in the winter months. But if you live somewhere that doesn’t get as dry as New England, then definitely plant your ZZ plants in unglazed terra cotta pots.
Check out my ZZ Plant Guides
How to Repot ZZ Plant and How to When It’s Time to Repot?
How to Divide ZZ Plant (Zamioculcas zamiifolia video)
How to Take Care of Your ZZ Plant (Zanzibar Gem)- Infographic
What to do with the new ZZ plant that you bring home (Do’s & Don’ts)

