
Have you ever walked out to your garden, looked at your hydrangea, and thought, ‘Is my hydrangea dead? ’
Don’t panic just yet! In most cases, your hydrangea isn’t dead. It’s simply under stress, and with the right care, you can bring it back to life.
In this video, I’ll show you the most common reasons hydrangeas look like they’re dying and the exact steps you can take to revive them and keep them healthy.
Underwatering
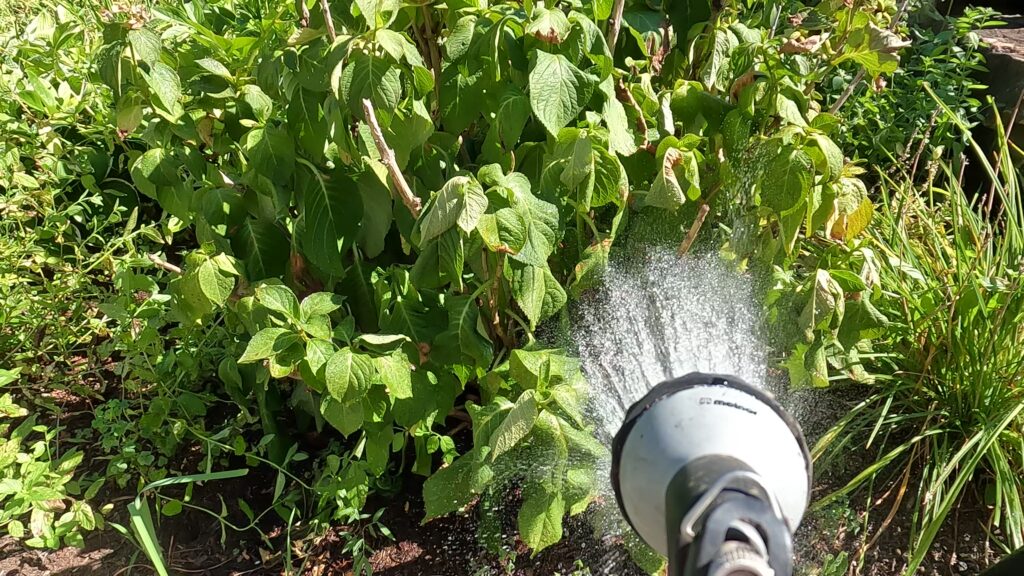
One of the most common reasons hydrangeas look dead is simple, it lacks water. You are underwatering your plant.
Hydrangeas are thirsty plants, especially in warm weather. If you skip watering for a few days during a heat wave, the leaves droop dramatically, making the whole shrub look dead.

It looks alarming. But the good news is, this is one of the easiest problems to solve. A deep soak usually brings them back.
I’ve had hydrangeas look like they were dead when I got back from vacation, but after a slow, deep watering, the leaves perked up within 24 hours.
Don’t just splash water on the surface; that’s not going to revive your hydrangea. Water slowly at the base so the roots really absorb it.
For potted hydrangeas, make sure the water drains well, but don’t let the soil completely dry out between waterings.
Too Much Sun
Another common reason hydrangeas look like they’re dying is too much direct sunlight. Hydrangeas love bright light, but too much direct sun—especially in the afternoon—can be harmful for them.
If you see the leaves turning brown, dry, or crispy at the edges, that’s usually a sign of sun stress. Hydrangeas truly prefer morning sun followed by afternoon shade.
When I first started gardening, I made the mistake of planting one of my hydrangeas in full sun. Even with consistent watering, the leaves regularly show browning. The plant survives, but it never looks its best.
If you’re in a similar situation, the best long-term solution is to transplant your hydrangea to a location with more shade, especially in the afternoon.
It’s a big task, which is why I’ve left mine in place—but if I had the chance to replant, I would absolutely choose a shadier spot.
This is why choosing the right location from the beginning is so important. I actually have an article about hydrangea planting location mistakes—be sure to check it out.
Transplant Shock
Transplant shock is another common source of stress for hydrangeas. If you’ve ever moved a plant in the middle of summer, you’ve likely seen this happen.
When transplanted during hot weather, hydrangeas rely on immature roots that simply can’t keep up with the plant’s water needs. As a result, the leaves often wilt, curl, and sometimes drop altogether.
The best way to help a hydrangea recover is with consistent care. Water deeply every day during the first few weeks, and add a layer of mulch around the base. Mulch helps conserve soil moisture, regulate soil temperature, and protect the developing roots.
It’s important to be patient. The plant may look stressed for a while, but as the root system strengthens and settles in, it will usually bounce back.
For the best results, plan to transplant hydrangeas in spring or fall, when cooler temperatures make the transition easier. Not only does this reduce transplant shock, but it also saves you from the constant task of daily watering.
Fungal Disease
Sometimes, the issue with hydrangeas isn’t water or sunlight but disease. These plants are particularly susceptible to fungal infections, especially in damp or humid conditions.
The two most common problems are leaf spot and powdery mildew. Leaf spot appears as brown or tan spots with darker edges, while powdery mildew looks like a white, powdery coating on the leaves.

If left untreated, both conditions weaken the plant over time. To manage fungal issues, begin by pruning to improve airflow around the shrub. Always remove and dispose of infected leaves in a sealed bag rather than composting them, to avoid spreading the problem.
If the infection is widespread, a copper-based fungicide can help bring it under control. It may sound intimidating, but the good news is that when caught early, hydrangeas usually recover well.
Overwatering
While hydrangeas need regular moisture, too much water can make them look as though they are dying. Signs of overwatering include brown leaf edges, yellowing leaves, and sudden leaf drop. This happens because excess water suffocates the roots and, over time, can lead to root rot.
Overwatering can be a challenging issue to correct, but it is not always hopeless. The first step is to stop watering and allow the soil to dry out.
Once the soil has dried out, adjust your watering routine. Before you water, always check the soil first.
The simplest method is the finger test: insert your finger about an inch into the soil. If it still feels damp, wait before watering. If it feels dry, then water deeply. Remember, hydrangeas prefer soil that is consistently moist, but never soggy.
Another thing you need to do is to check the planting site—sometimes hydrangeas are placed in low areas where water tends to collect, such as near a gutter downspout. If that is the case, the long-term solution is to relocate the plant to a better draining spot.
It is important to understand that if your hydrangea has been sitting in waterlogged soil for too long, root rot may have already set in. Unfortunately, once root rot develops, it’s hard to save your plant, and recovery is very unlikely.
Your best option is to remove the affected plant and start over with a new plant. The key is catching the problem early, before it’s too late.
Check out my article on hydrangea watering mistakes to avoid.
Too Much Fertilizer
Over-fertilization is another reason why your hydrangeas look unhealthy. When too much fertilizer accumulates in the soil, it can damage the roots, causing the plant to wilt, turn brown, or develop scorched leaf edges.
If you suspect your hydrangea has been over-fertilized, the first step is to flush the soil with plenty of water to wash away the excess fertilizer.
Going forward, limit fertilization to once a year—early spring is ideal. I personally fertilize my hydrangeas only once per year, and that is all they need to thrive. Remember, with hydrangeas, less is often more when it comes to fertilizing.
Slugs and Snails
Another reason why your hydrangeas are not looking healthy is that it is infested with pests such as slugs and snails. They typically target young, tender leaves. You’ll know they’re the culprits if you see irregular holes in the leaves.

The good news is that they are relatively easy to manage. You can hand-pick them, set out shallow dishes of beer as traps, or use copper tape to keep them away. Some gardeners also scatter crushed eggshells around the base, which slugs hate crawling over.
Personally, I’ve had more trouble with slugs on my hostas than my hydrangeas—but it’s definitely something to keep an eye on.
Dormant
Sometimes new gardeners mistake a dormant hydrangea for a dead one. Especially during fall and winter, hydrangeas naturally go into dormancy, which can make them look dead.
So how can you tell the difference? The first clue is buds. Look closely along the stems—if you see small buds forming, that’s a sign your hydrangea is alive. These buds will eventually sprout new leaves, proving the plant is simply resting, not dead.
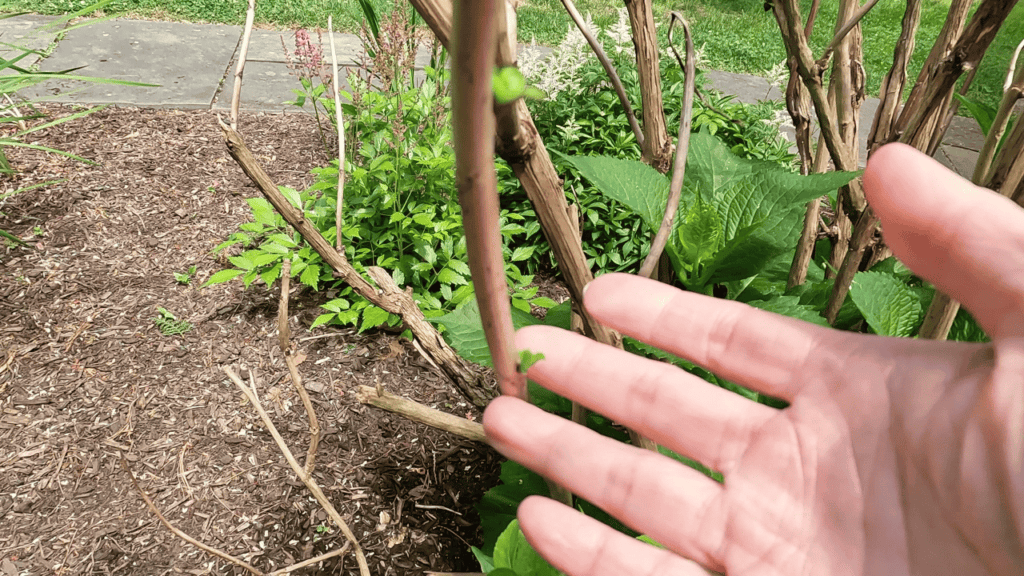
Another method is the stem test. Gently bend a stem—if it’s flexible and doesn’t snap, the plant is dormant. Dead stems are brittle and break easily. Even if the stems look brown or gray, flexibility usually means the plant still has life.
Patience is key. Wait until spring before making a final assessment. As the weather warms, you should start seeing tiny leaves emerging from the base or buds along the stems. That’s your hydrangea signaling it’s alive and ready to grow again.
Some Brown Leaves are Normal
It’s completely normal for hydrangeas to have a few brown leaves, especially during periods of intense summer heat. This is usually just a sign that the plant is experiencing temporary stress from a heatwave.
As long as the hydrangea recovers and the majority of the plant looks healthy, a few brown leaves are nothing to worry about.
You can simply prune them away if you like, but they won’t harm the overall health of your plant.
Get Your FREE Hydrangea Care Tracker Printable

Sign up once and you will get access to ALL exclusive content on this website. After unlocking the printable, just save the printable image and then print it. Use it to keep track of your hydrangea care! I hope you like it!
You May Also be Interested in these Hydrangea Care Tips
Step by Step: How to Easily Propagate Hydrangeas (video)
How to Deadhead Hydrangeas (video)
How to Make Hydrangeas Flower (video)
Beginner’s Guide: How to Care for your Hydrangea (video)
Can I Transplant Hydrangeas in the Summer?